About
This document targets beginner-intermediate developers who want to build their own virtual Ring Try-On application using ManoMotion’s PRO SDK. You will learn how to access ManoMotion’s features in an easy manner, without any prior knowledge of the SDK. By the end of the tutorial, you will be able to show a virtual ring on your finger using Augmented Reality. How cool is that !
Requirements
- General knowledge about the Unity 3D engine.
- Unity 2019.4.2f1 or higher with iOS / Android deployment capabilities.
- An iOS / Android device for deployment (preferably a high end device).
- ManoMotion’s latest PRO Unity Package.
You can access the official SDK PRO documentation in your downloaded Unity package. For more “how-to” material, visit our YouTube channel and join our official Discord server.
Contents
Part 1 – Getting the finger’s information
Part 2 – Visual improvements
Part 3 – Limitations and Guidance
Part 4 – Adding a ring!
Part 1 – Getting the finger’s information
First of all, let’s get familiar with the SDK package. There are several important components that you will need to know about during the development of the application. Some of them collect the information coming from the library and display it to you in an accessible manner, while others ease the implementation and representation of such information.
First steps:
- Set your build platform to Android/iOS depending on your device.
- Download and extract SDK Pro latest version in your new Unity Project (use the 3D template).
- Let’s prepare the Scene to make your app use ManoMotion’s hand tracking features. First, add the following prefabs and configure them as follows. They can be found in ManoMotion > Prefabs:
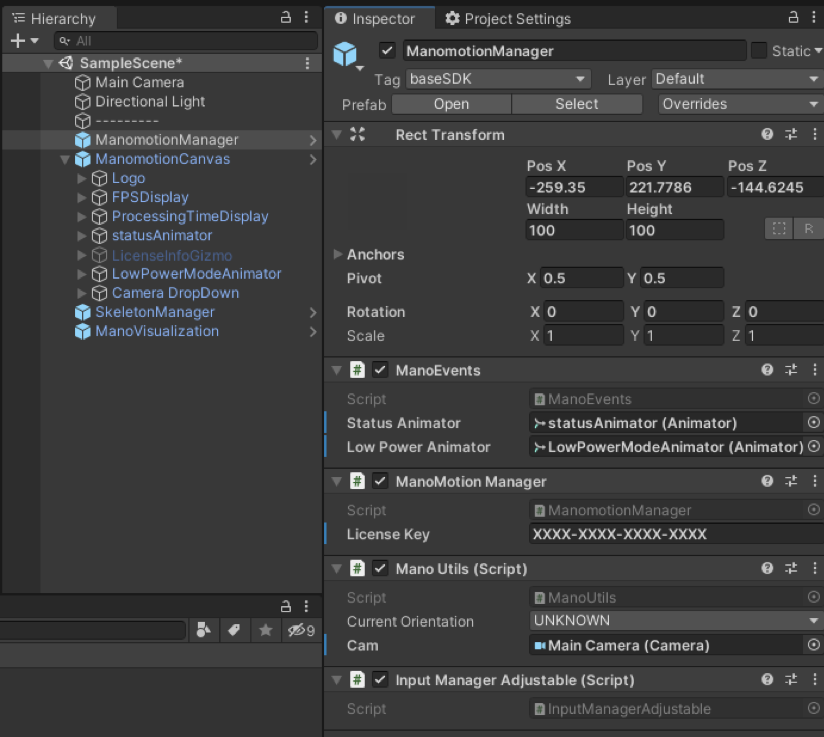
- ManomotionManager
- Add your license Key in the ManoMotion Manager script
- Set your Main Camera as “Cam” in the Mano Utils script
- ManomotionManager
Set the statusAnimator and the LowPowerAnimator from ManoEvents to the corresponding prefabs inside the ManoMotionCanvas prefab in the scene

- Let’s prepare the Scene to make your app use ManoMotion’s hand tracking features. First, add the following prefabs and configure them as follows. They can be found in ManoMotion > Prefabs:
- ManomotionManager
- Add your license Key in the ManoMotion Manager script
- Set your Main Camera as “Cam” in the Mano Utils script
- Set the statusAnimator and the LowPowerAnimator from ManoEvents to the corresponding prefabs inside the ManoMotionCanvas prefab in the scene
- ManomotionManager
- ManomotionCanvas (disable “Camera DropDown in inspector”)
- ManoVisualization
- Set your Main Camera as “Cam”
In your Player Settings, set your Company Name and Product name as the one you will find in your Dashboard on ManoMotion’s webpage. You can change the default strings for these, but once the license is activated (the first time the application runs on a device), they will be locked as they are bound to the license.
NOTE: Check that the License and your bundle ID match (you can check that out in your Dashboard) – you can also use Unity’s Other Settings > Override Default Package Name
If you build and run the application, you will be able to see a 2D representation of the hand’s skeleton if you put it in front of the camera. Congratulations!

Now, let’s implement the features that will allow you to show the finger’s information – that is, the library’s finger width and position in real time. This is where the ring will be placed in your app.
- Add the TryOnManager to your scene. You will find it in Manomotion > Prefabs > TryOnFeatures
- Create a new GameObject “Ring” in the scene. This GameObject will enable the finger information features from the SDK. For that, let’s create a new Script “RingManager” and add it as a component to the Ring GameObject.
Add a FingerInfoGizmo that will show visually where the ManoMotion tracking detects the fingers’ info points (you can serialize this field).

In the Start method, assign the orientation to PORTRAIT and get the FingerInfoGizmo GameObject from the TryOnManager (if we serialize the FingerInfoGizmo field, we can assign it from the Unity Inspector):
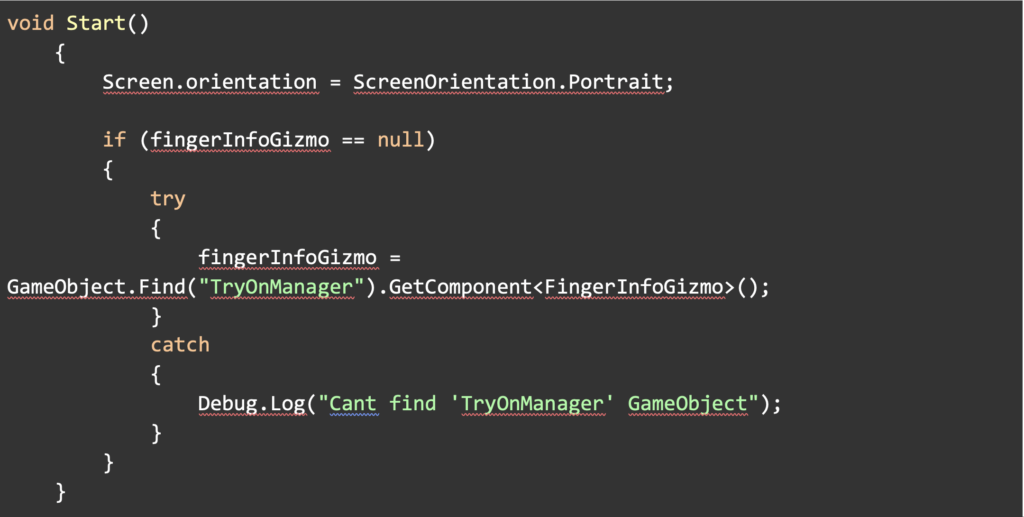
Then, let’s tell the SDK we need to get the finger information:

In the previous method, we access the ManoMotionManager singleton in order to change the session settings. We enable gesture recognition, finger info tracking and we also set the default finger to track to 4 (the ring finger).
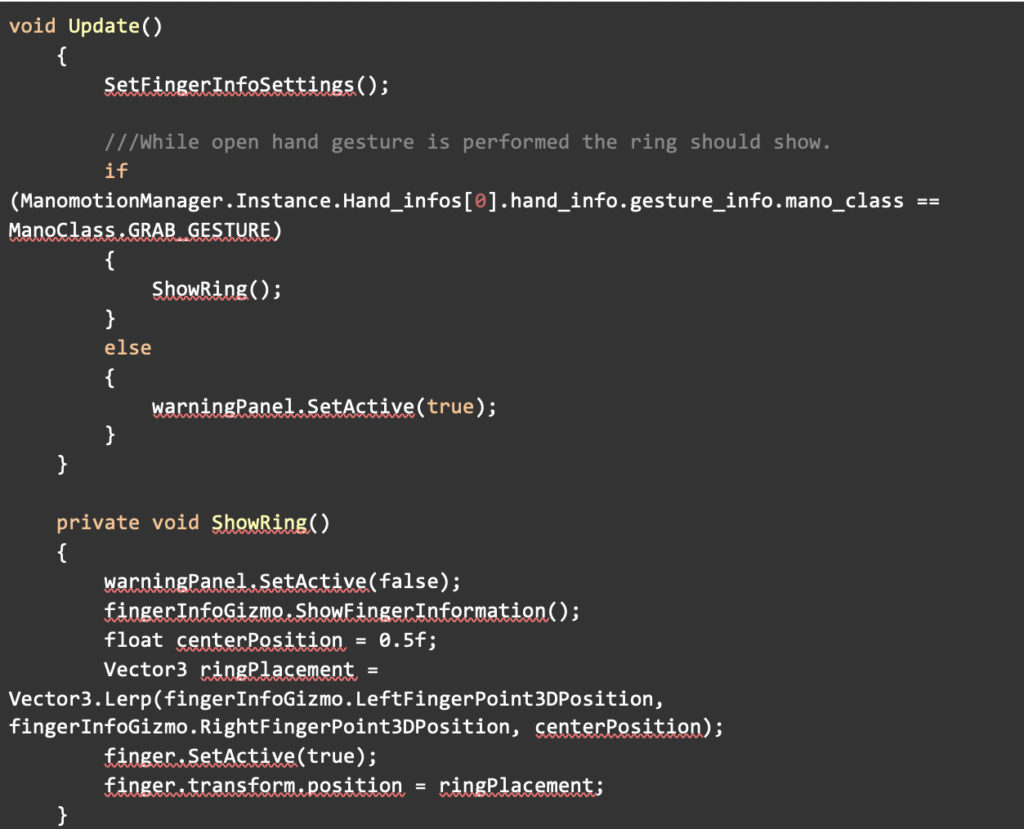
Finally, we update every frame with this finger’s information.
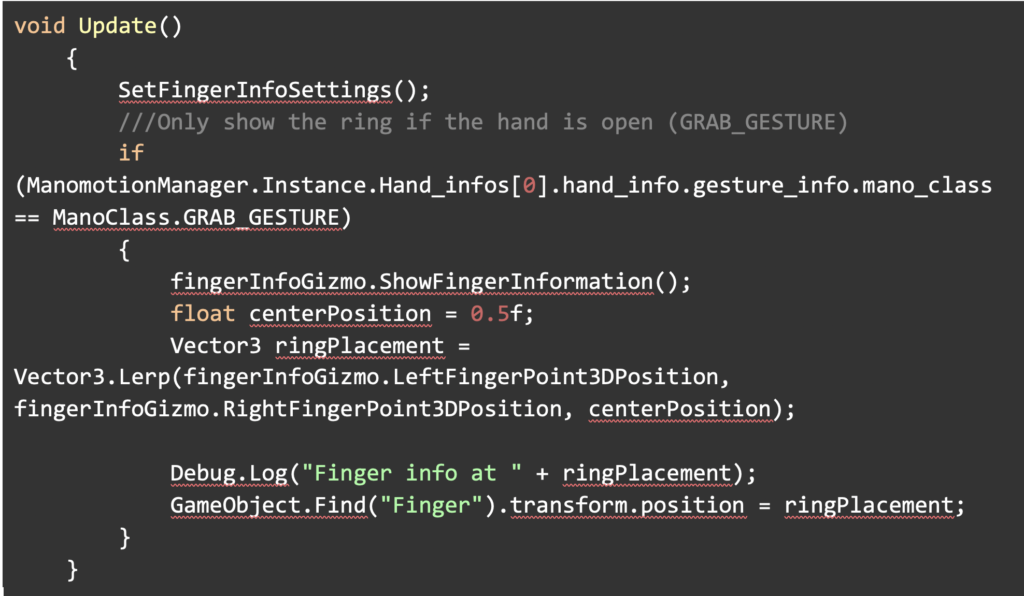
In the previous method, we check that the Session’s settings are correct. Then, if the hand is in the GRAB_GESTURE (hand open) we show the finger gizmo in the ring finger.
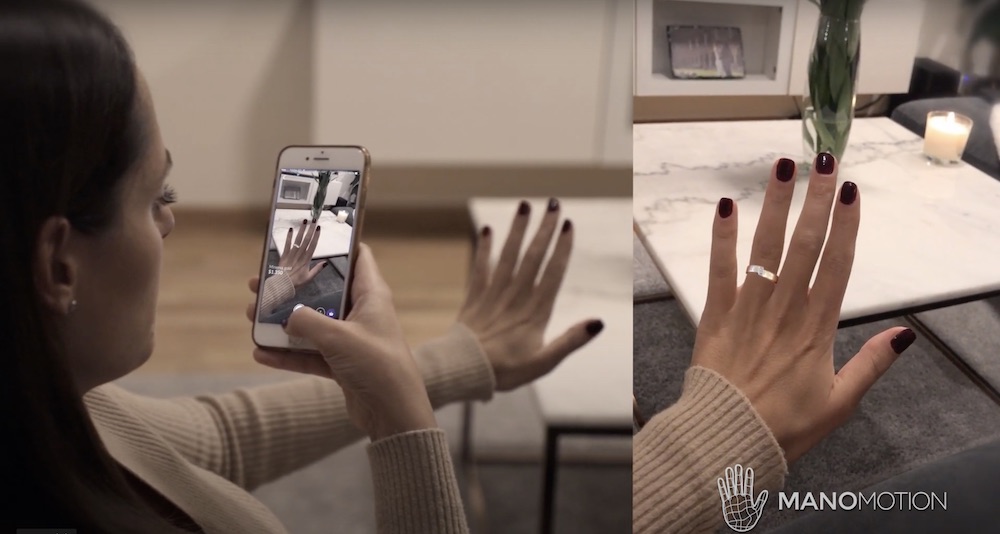
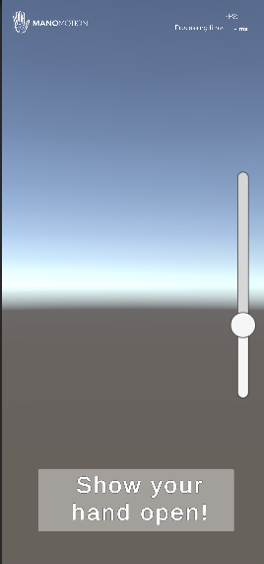
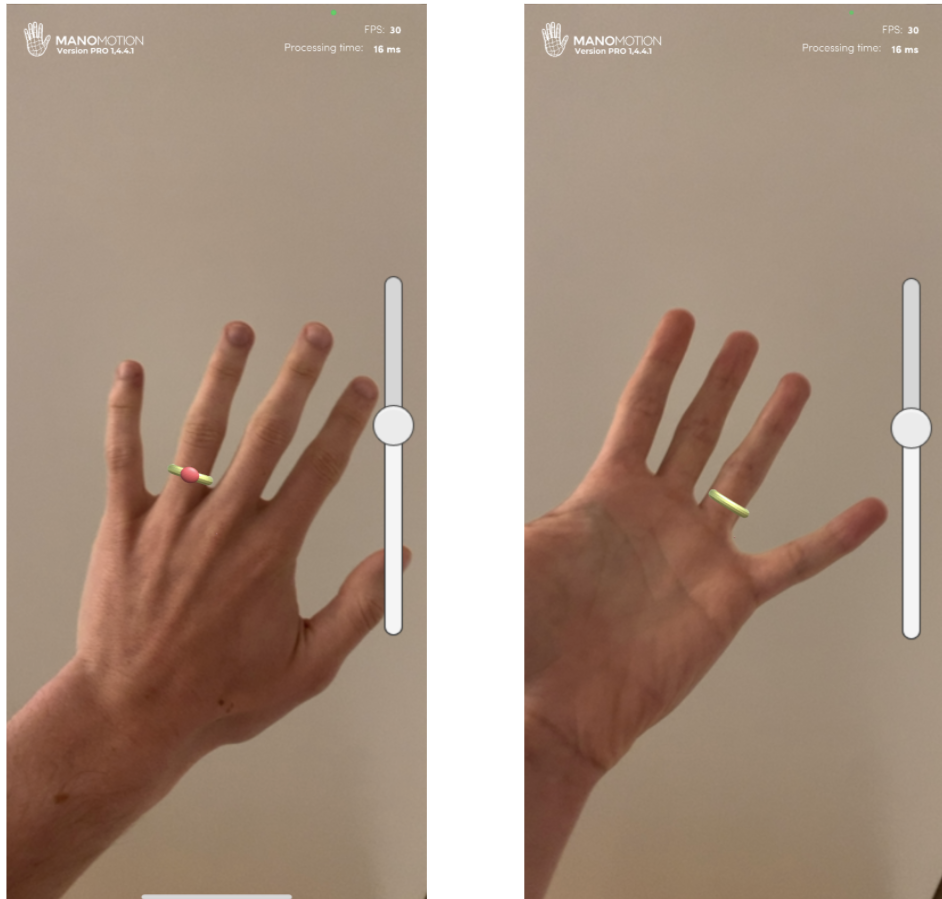
If you build and run the app, you will see something like this:
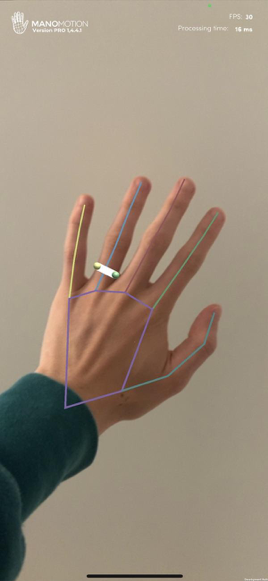
You probably will notice some jittering coming from the skeleton. We will fix this in the next part of the tutorial, along with some more visual improvements.
Part 2 – Visual improvements
In the first part of this tutorial we learned about how ManoMotion’s SDK displays the finger’s information in our Unity application. Now, we will work on some features to make it look a little bit nicer, so don’t miss out!
First of all, we will disable the visualization of the 2D skeleton. After all, it is not something we’re interested in seeing while trying a fabulous ring, right? 🙂
To do so, we will go to our SkeletonManager prefab in the scene and set the 2D Joints to “2D Joints No lines” – that will make the joints invisible, and the app will only show the ring information.

We will now reduce the jittering of the finger tracking. As you may have noticed, the finger info gizmo will behave a little bit strangely in some situations, for example, when you move your hand too fast, or it will move around when you keep your hand still. This happens because the finger’s position is updated in each frame. To solve this problem, we will introduce some smoothing to make it look nicer.
We will use ManoMotion’s Manager smoothing value for this, so we don’t have to implement the smoothing function by ourselves. On the other hand, we have to add a way to interact with this value:
- Add an EventSystem GameObject: right click on Hierarchy > UI > EventSystem
- Create a new Canvas:
Right click on Hierarchy > UI > Canvas
- Set it to Screen Space – Overlay
- Set UI Scale Mode to Scale With Screen Size
- Inside the canvas, create a new UI > Slider. Place and scale it the way you feel looks good! I’m right handed, so I will place it vertically along the right edge of the screen
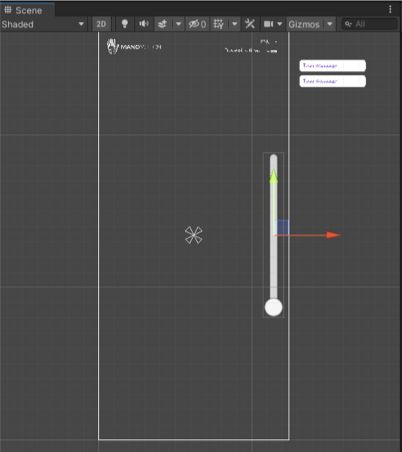
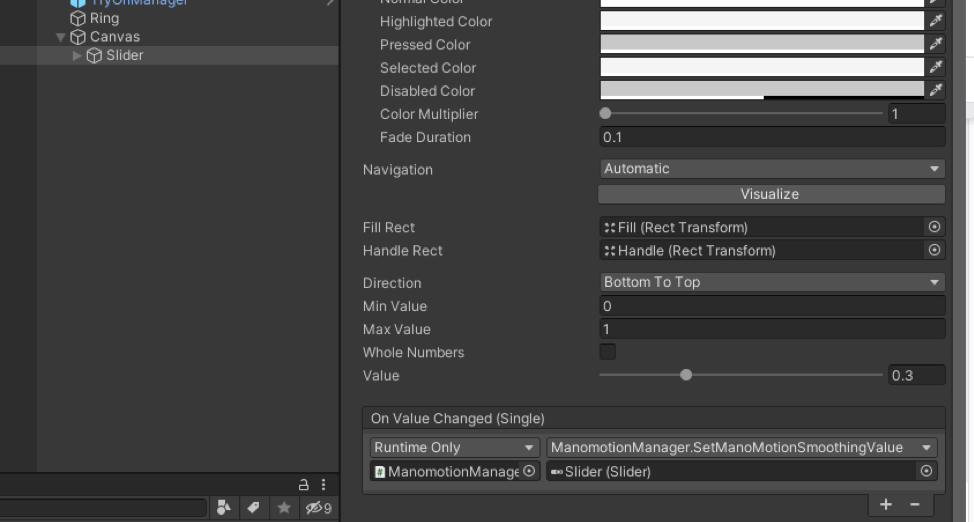
You can set a default smoothing value for the slider: I will set it to 0.3 – the smoothing values are normalized to be set between 0 and 1 at all times (with 0 being no smoothing, 1 maximum smoothing)
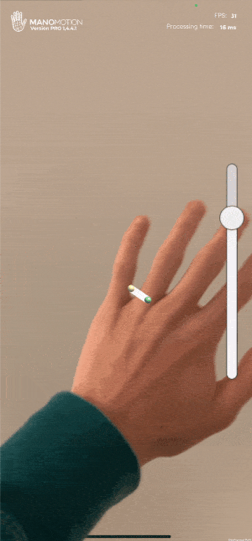
Let’s now link the slider with the smoothing value: in the Slider inspector window, set the OnValueChanged event to SetManoMotionSmoothingValue(Slider) and add the slider to the parameter reference in the method.
There’s a caveat about how smoothing works: the higher the value is, the slower the ring gizmo will move. This happens because the system interpolates between the different positions where the hand has been in the previous frames, so play a little bit with the values to check it out and see how it fits your application.
Part 3 – Limitations and Guidance
In the second part of the Ring Try-on tutorial, we learned how to improve the tracking visualization in order to provide a smoother experience for the users. Now we will learn how to guide them when using our app for the first time, making our app more accessible to non-tech users! As developers, we sometimes take for granted some things such as hardware/software limitations, but that isn’t usually the case for the regular user.
We will now add some clues to make our app intuitive. We will take into account the distance of the hand to the camera, as well as its placement in the frame.
First of all, create a warning object inside the UI that will tell the user to put their hand in front of the camera, it could be something like this:
Let’s now modify our RingManager script to allow the warning panel to appear and disappear when it detects a change in the hand’s tracking.
Do the following changes:
Add a public GameObject warningPanel field:

Extract all the code related to finger information into a new method (ShowRing()). Then in Update() check if there is an open hand detection to show the information, if not, set the warning panel to Active. Set the warningPanel field in the inspector to your WarningPanel GameObject or assign it in the Start. I also created a “GameObject finger” field and assigned it in the same way.
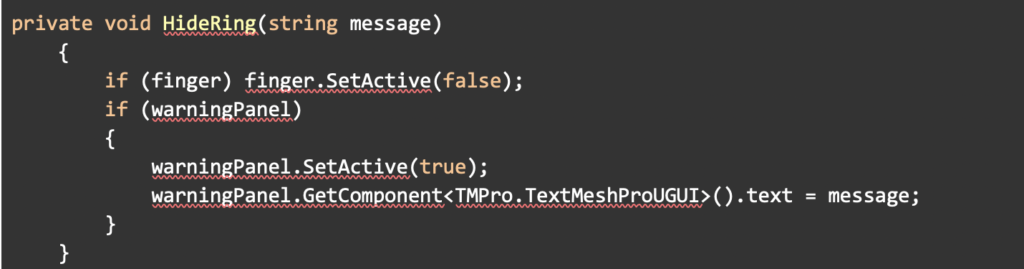
If you build the app, you will see that the panel appears and disappears depending on the hand’s detection. But if you put it too close or too far to the camera, some tracking issues may appear. Let’s add some depth detection to our script, as well as some refactoring:

Reference video for limitation on Youtube.
Part 4 – Adding a ring!
This will be the last part (for now!) of the Ring Try-On series of tutorials. So far, we have learned how the ManoMotion SDK tracking works, how to make it look nicer and how to guide users through the application. Let’s now get to the real business: showing a ring instead of the finger information gizmo.
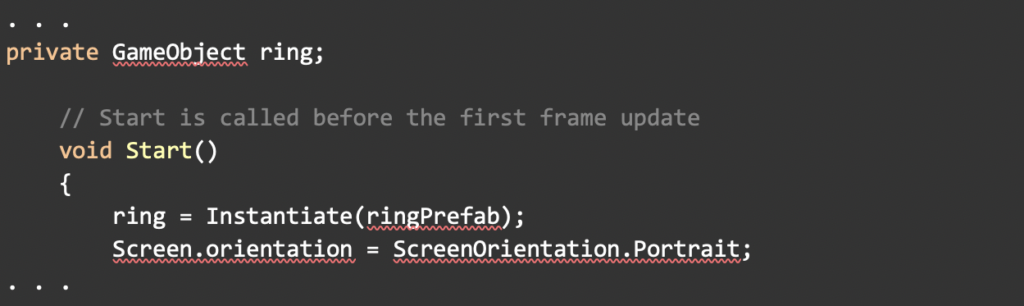
First of all, let’s create a public field that will be the reference of our ring prefab. We will call it “ringPrefab”. Then, we can assign the prefab of our preference in the inspector.

In my case, I will instantiate it in Start() and assign the reference to a private field in the class:
Now we have to get rid of the “Finger” GameObject, which as we have seen, is just a representation of how the SDK interprets the finger information. We do not want to see this in our final application, so replace the references to “Finger” to our “ring” GameObject. Also, deactivate it in the Start() method. (GameObject.Find(“Finger”).setActive(false))
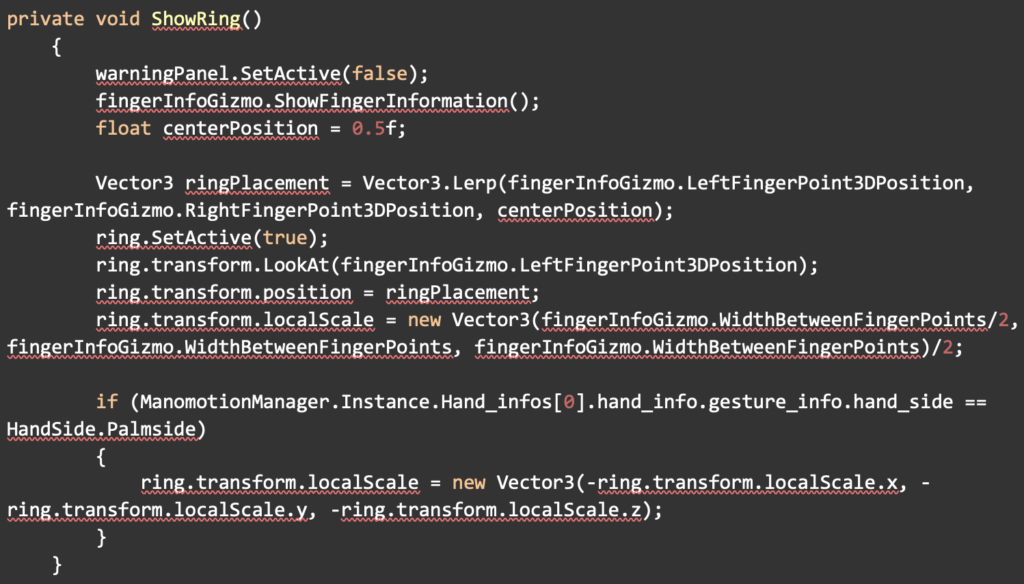
Edit the ShowRing() method to make the ring prefab follow the finger’s rotation, scale and position properly. It should look like this:
Now we need an actual 3D model of a ring! You can find one in:
Manomotion > Examples > FingerInformationExample > ringparts.prefab
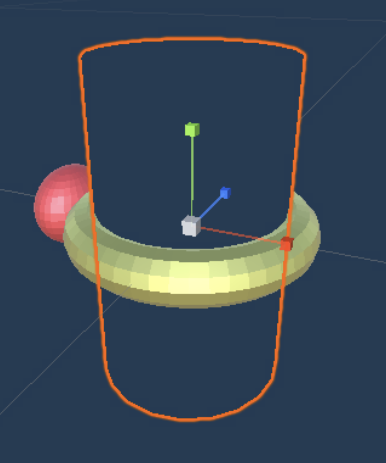
If you explore it a little bit, you will see that it contains a couple of GameObjects:

We have to find a way to occlude the parts of the ring that shouldn’t be visible. We can do so using a Cylinder that will simulate the finger bone. Place it inside the ring:
But it doesn’t look like a finger… It doesn’t have to! Let’s create a shader to make it look invisible but also make it occlude the geometry behind it, but not the background, so it simulates the finger being there without having to code any logic.
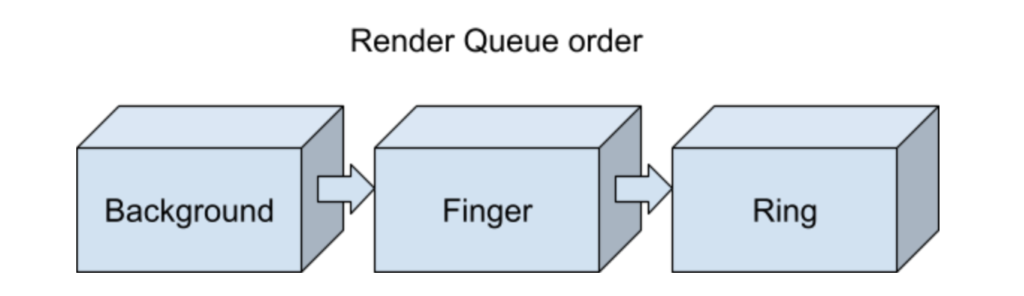
The ManoMotion’s background render queue is set to Transparent (3000). So the “finger” render queue should be between Transparent and the ring’s geometry.
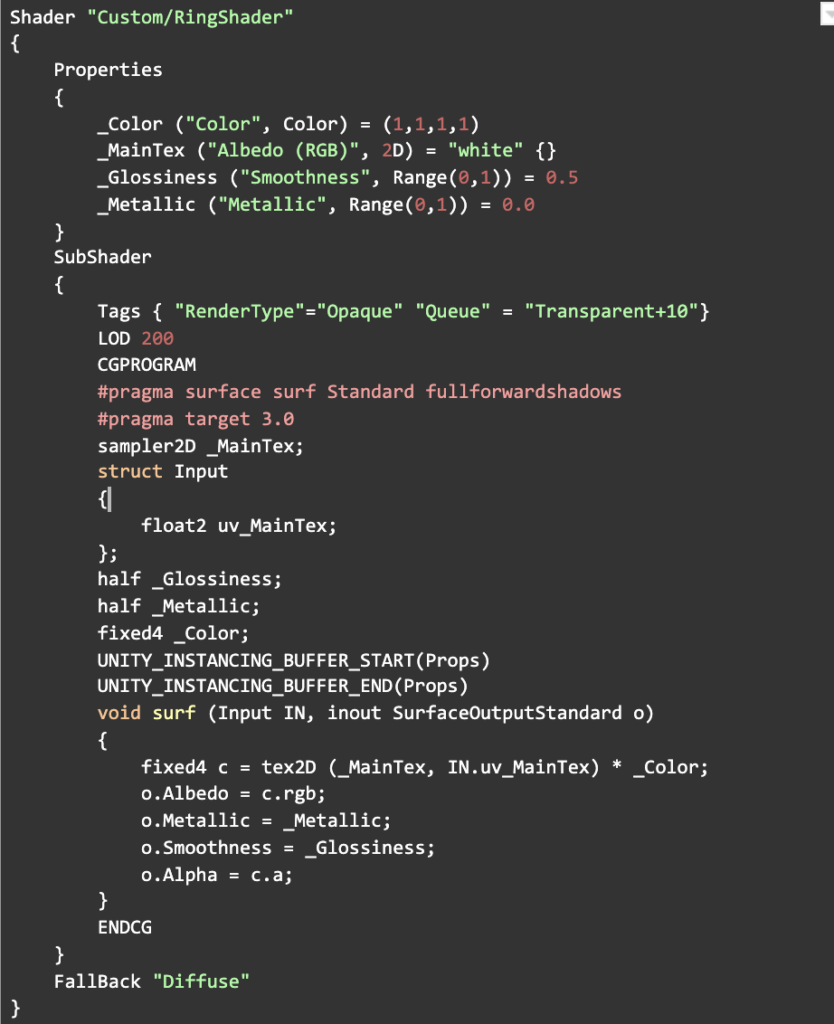
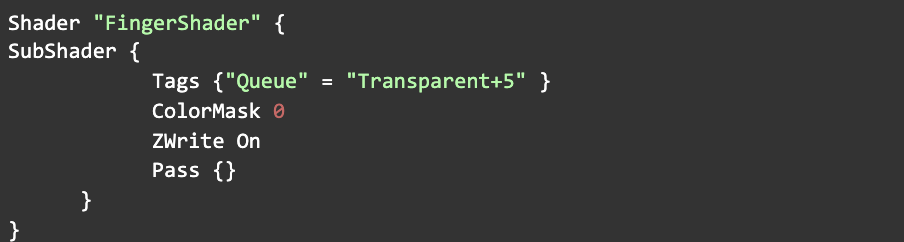
First, we have to modify the ring materials using a new shader. Create a new shader file in Create > Shader > Standard Custom Shader and replace it with the following code. Then, change the ring material’s shader to this new one.
Apply the following shader to a new material (Create > Material) (and add it to the cylinder):
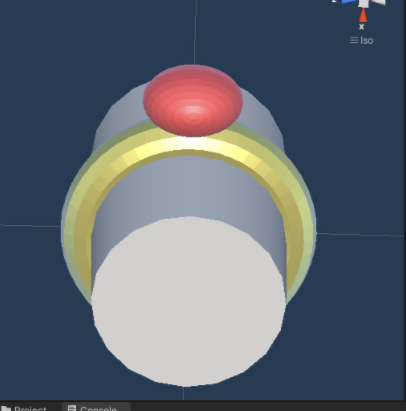
And here we have it! Build the app and see the result:
You can do so many improvements to your own ring try-on application using the ManoMotion PRO SDK. For example:
- Changing the ring model using gestures (ManomotionManager.Instance.Hand_infos[0].hand_info.gesture_info)
- Changing the desired ring finger
(ManomotionManager.Instance.ToggleFingerInfoFinger)
- Changing the tracking mode to enable 3D tracking (ManomotionManager.Instance.ShouldCalculateSkeleton3D)
Find much more in Manomotion’s official documentation (included in the Unity package) and in our official API Reference.
Feel free to contact us on our webpage, social media and other official channels for more information. Good luck and have fun developing with ManoMotion!